To learn about statistics for calendar sponsorship opportunities, watch from 5:04 to the end below:
To view sponsorship statistics:
Go to Analytics > Dashboard
Click “Export Data” in the top right-hand corner
Click Sponsorship Clicks and Continue
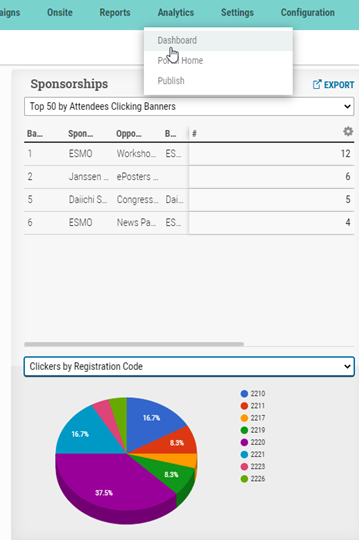
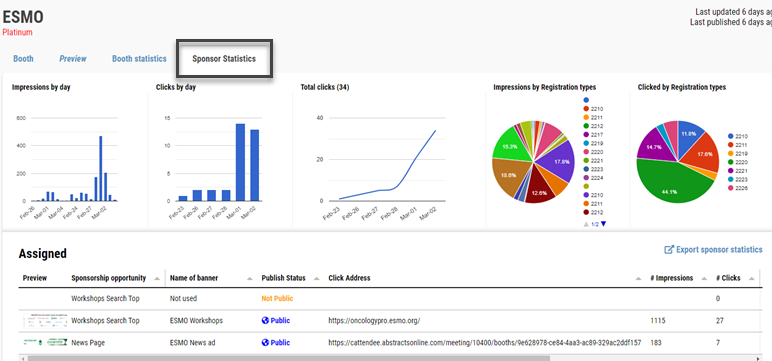
Here you’ll see multiple sponsorship statistics and most notably:
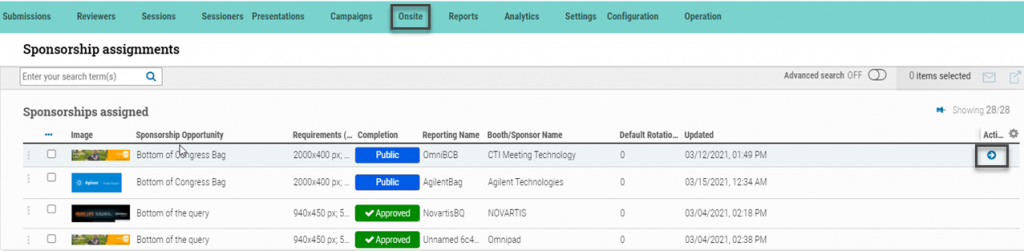
1. The booth clicked in association with the sponsorship (BoothName). Remember a booth must be associated with a sponsorship for the booth to be created 2. Type of sponsorship clicked (BoothSponsorshipTypeName) 3. The ReportingName is set up by the administrator under Sponsorship Assignments in either “Onsite->Sponsorship assignments” or “Onsite->Booths & sponsors and clicking on the booth where the sponsorship assignment is set up.” The ReportingName (below) is valuable for administrators to give sponsorships unique naming conventions for the statistics reports
4. The link that was clicked (BannerLinkUrl) 5. What time the link was clicked (DTStamp) 6. Who clicked the link (LastName, FirstName)
Arranging these 6 main categories into a pivot table will give administrators valuable data as to the most popular sponsorships.
Here you’ll see multiple booth statistics and most notably:
1. The booth that was clicked (BoothName) 2. The type of link in the booth that was clicked (BoothLink) 3. The title of the link clicked in cAttendee (BoothLinkTitle) 4. What time the link was clicked (DTStamp) 5. Who clicked the link (LastName, FirstName)
Arranging these 5 main categories into a pivot table will give administrators valuable data as to the most popular booths and links inside.
Before a virtual or hybrid meeting with booths, the association may want someone to review or check their booth.
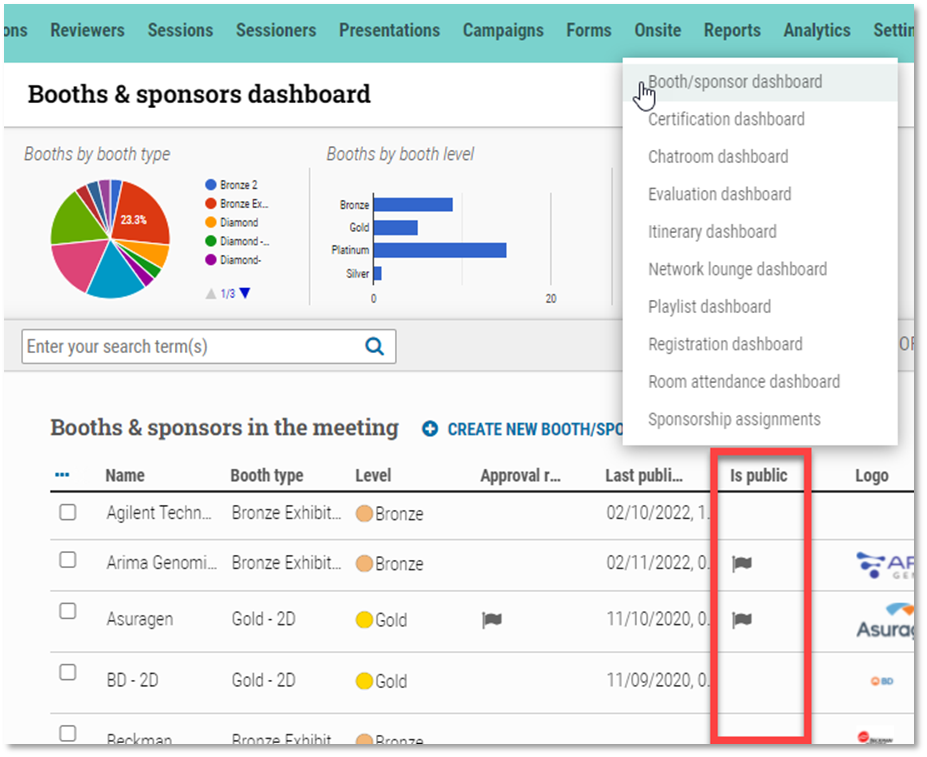
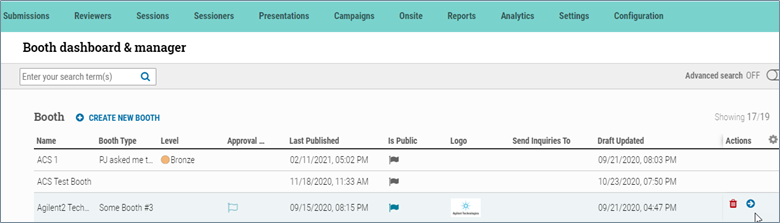
To restrict access to a booth: 1. Go to Onsite > Booth/sponsor dashboard and check “Is public” off highlighted below (the URL and booth will both be disabled)
To allow access to a booth: 1. Go to Onsite > Booth/sponsor dashboard and check “Is public” to a filled in state (the booth will be visible in the meeting and the URL link)
This setting will allow administrators to control whether a booth is visible or not to make more changes.
There’s a new way to create revenue opportunities in your virtual meetings, along with the sponsorship of banners, pages, congress-bag inserts, and more. With sponsoring company self-management and state-of-the-art analytics, we’re already helping customers recover a portion of revenues lost due to pandemic disruption. With the functional expansion now on production, we have started to add the components to allow sponsorship of specific sessions and presentations via the Virtual Meeting search results pages.
There’s a way to create revenue opportunities in your virtual meetings, along with the sponsorship of banners, pages, congress-bag inserts, and more. With sponsoring company self-management and state-of-the-art analytics, we’re already helping customers recover a portion of revenues lost due to pandemic disruption. With the functional expansion now on production, we have started to add the components to allow sponsorship of specific sessions and presentations via the Virtual Meeting search results pages.
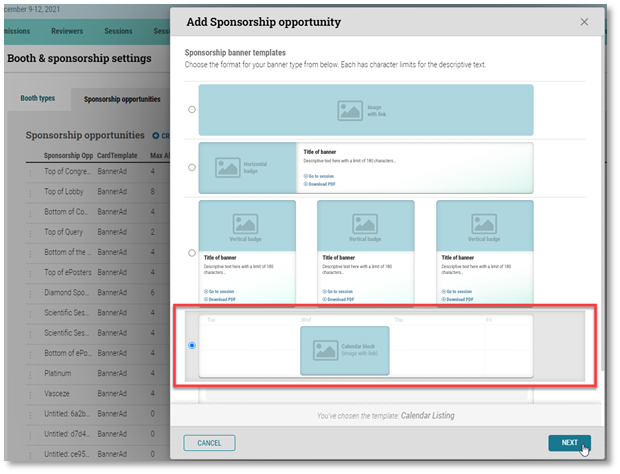
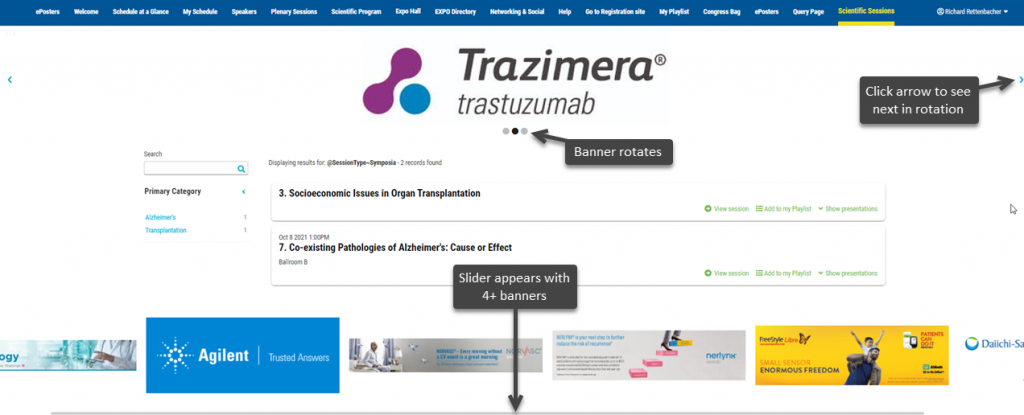
The first step was to add two new types of sponsorship opportunity types that you will find in the “Add Sponsorship opportunity” section – one for sponsorship banners overlaying a session on the calendar search results page, and one for sponsorship banners overlaying session (and ultimately presentation) details on the list search results page.
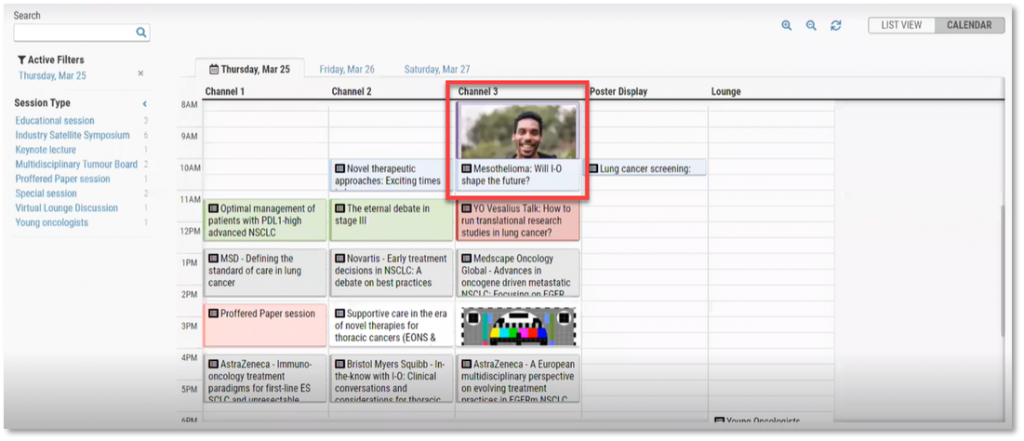
The next step was to connect the sponsorship banner to the calendar search result view, highlighted below:
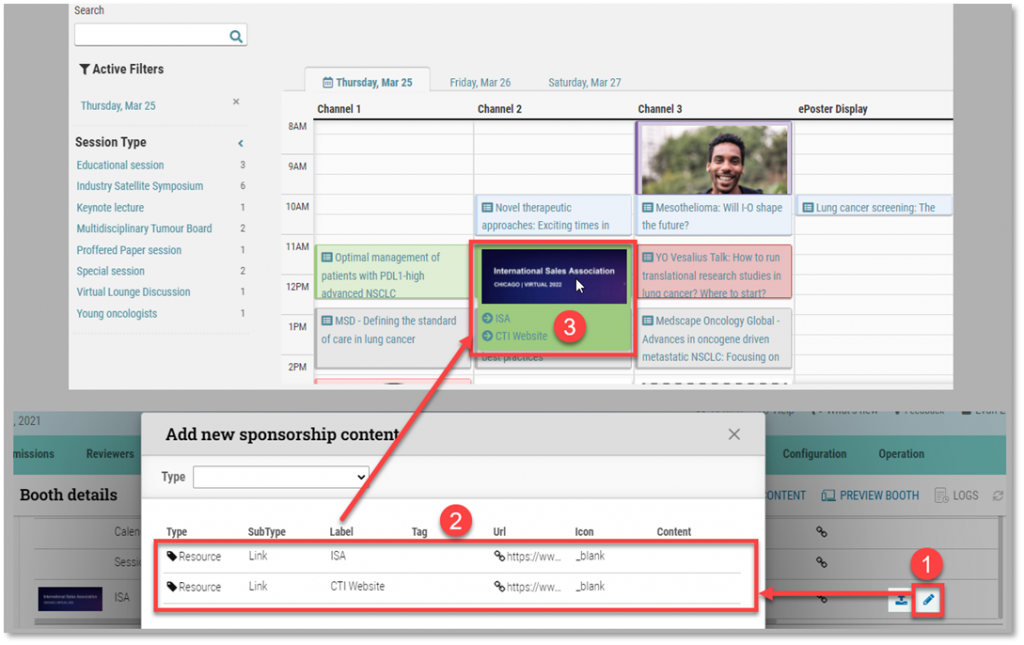
This sponsorship opportunity image can be placed on the Calendar View connected to a specific session date and time. As with other CTI Virtual meeting sponsorship opportunities, these banners can contain more than one link, allowing sponsors to decide if the end-users will (1) click into the session, (2) click to an external website (often the website of the sponsor), or (3) click to a PDF file – or some combination of all three.
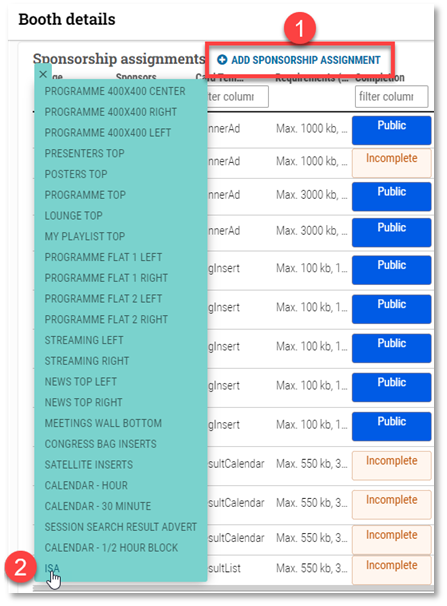
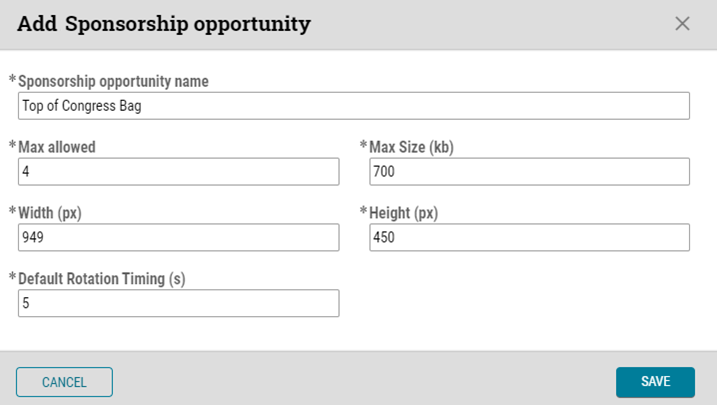
Watch the video above or use the following steps below to set up a sponsorship opportunity for a session: 1. Go to Settings > Booths and Sponsorship 2. Click Sponsorship Opportunities and select “Create New Sponsorship Opportunity” 3. Choose Calendar block and click Next 4. Name the sponsorship (i.e., what is the image or link name?) – The Max Size, Width, and Height are auto-filled to recommended settings – “Max # of Links” is the max number of links an attendee can click. The max is unlimited, but we suggest three. Only the links and labels that are uploaded will show. 5. Go to Onsite > Booth/sponsor dashboard 6. Either create a new booth for the sponsorship opportunity or choose an existing booth 7. In the Booth details under Sponsorship assignments, click “Add Sponsorship Assignment” 8. Choose the Sponsorship opportunity we created in steps 3-4.
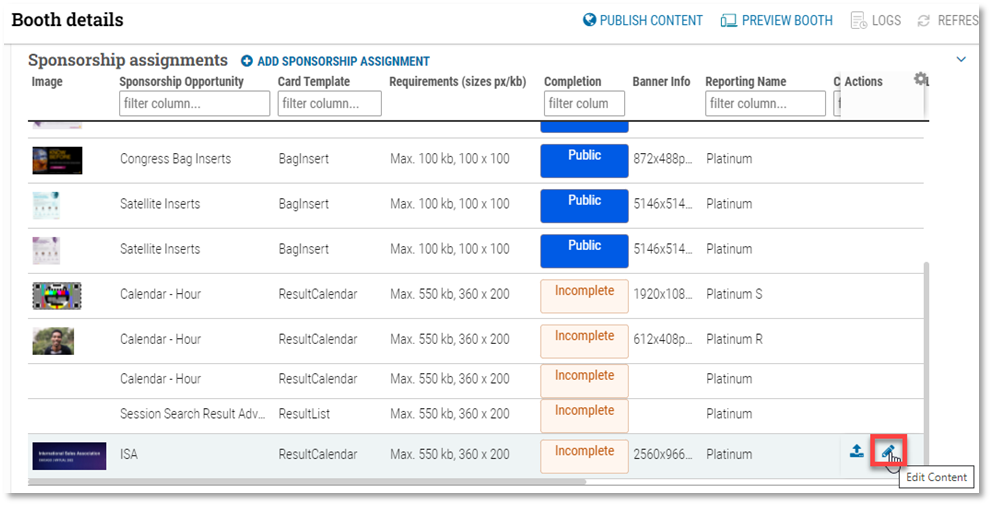
9. Click the “Edit Content” button under Sponsorship assignments next to the sponsorship
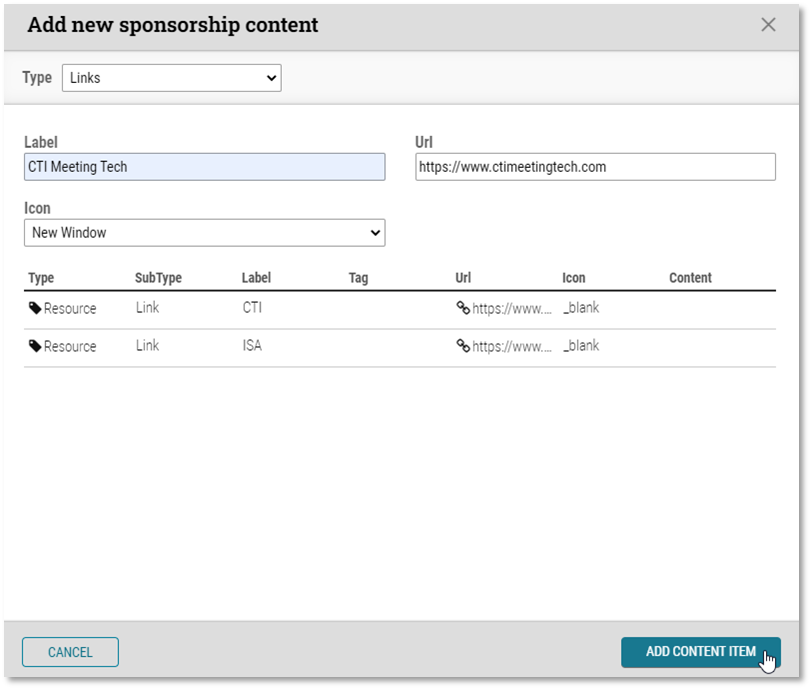
– Switch “Type” to “Links” (below image) – “Label” is the name of the link shown on cAttendee – URL is the link you want to showcase (e.g., https://www.ctimeetingtech.com) Make sure to include the “https://” before the link starts. This is the link the attendee will click for the website. If no link is uploaded here, the participant will be taken to the session that is sponsored. – “Icon” indicates whether you want the link to open on the same page or a new window
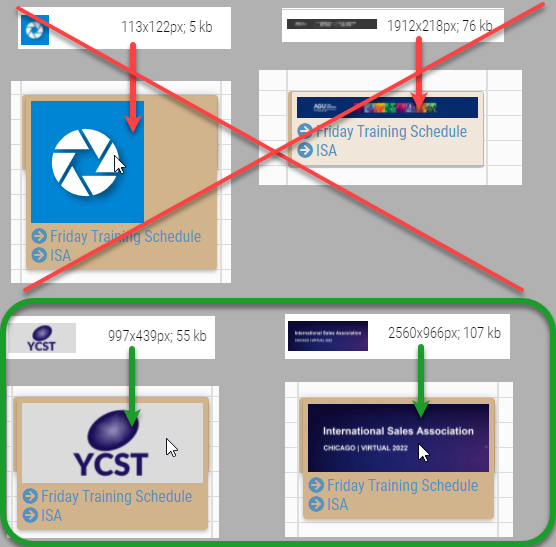
10. Upload an image using the “Upload” button
*The green examples below show you suggested image sizes in cAdmin (about a 9/4 ratio) and how they look in cAttendee:
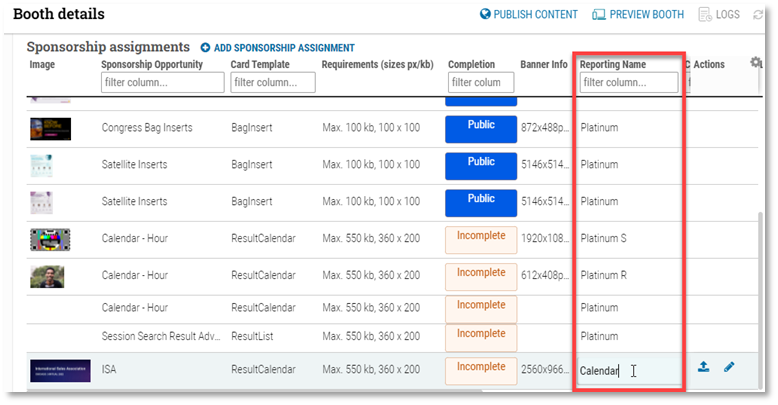
11. The “Reporting Name” column is the word that describes the booth after the name. Change to the desired name by clicking on the word (e.g., Calendar)
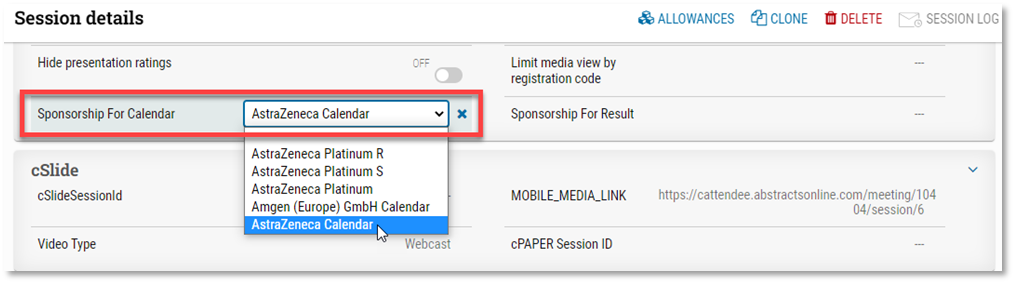
12. Assign the Sponsorship opportunity to a session – Go to the Sessions dashboard and choose a session to assign the opportunity – In Session details, find the dropdown “Sponsorship For Calendar” and choose the Booth/sponsor we added for the sponsorship opportunity (i.e., Booth name “AstraZeneca” followed by Reporting Name “Calendar”)
13. Check the calendar sponsor of a session in cAttendee
Note: If only one link is added to the sponsor opportunity, clicking the image goes to the website link. If you add two or more links, the link “Labels” show up below the image. In the example above, two links were added. To add more links, go back and do step 9 again. Also, remember when the sponsorship opportunity was created in steps 3-4 to set the max links higher than what you expect to use.
Similar to our other virtual meeting sponsorship opportunities, statistics and tracking are already available to track the success of these calendar marketing sponsorships. It is imperative to name the sponsorship opportunity and link labels distinctly from other booths and sponsorships within the meeting to make the data clear when an admin downloads the analytics.
An admin can view the Calendar Sponsorship of a Session analytics data by: 1. Going to the Analytics > Dashboard 2. Clicking “Export Data” 3. Selecting “Sponsorship Clicks” and clicking “Continue.”
We implemented bulk actions for booths and the networking lounge tabs under Onsite. This change saves admins time from manually creating new chatrooms from the dropdown in the Chatroom dashboard.
We implemented bulk actions for booths and the networking lounge tabs under Onsite. This change saves admins time from manually creating new chatrooms from the dropdown in the Chatroom dashboard shown below:
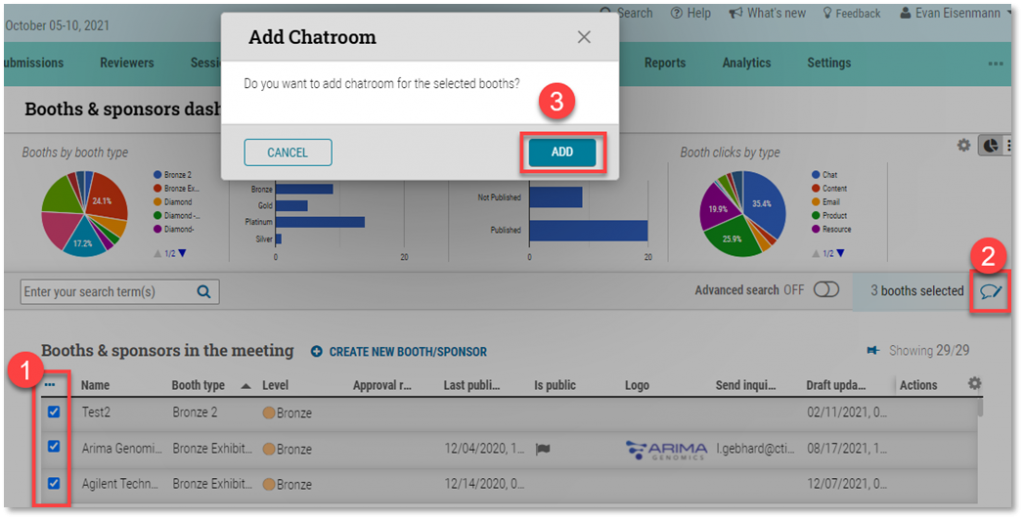
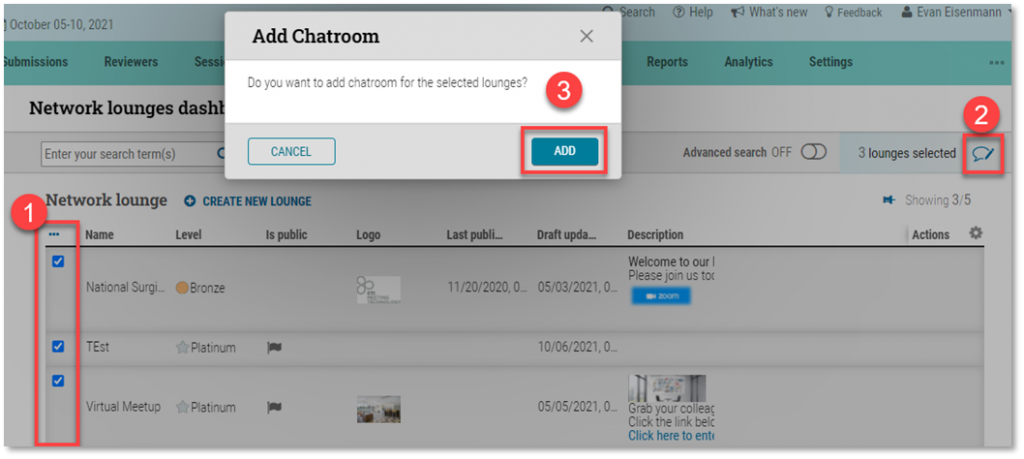
To assign booth and lounge chatrooms: 1. Go to the booth or lounge tab under Onsite and select all or only preferred items 2. Click the popup to the upper right “Add chatrooms” 3. Click “Add”
New way to add chatrooms to boothsNew way to add chatrooms to networking lounges
Provides a flexible means to designate banner/logo locations and specifications for their sponsors and exhibitors on the Virtual Meeting site. These tools create Sponsor Opportunities, indicate where they are located, specify how they will display (static, rotation, slider), and provide a means for uploading the banner or logo images.
Step 1: Create Sponsorship Opportunity – Go to Settings > Booth & Sponsorship Settings – Click Sponsorship Opportunities tab – Click Create A New Sponsorship Opportunity (or Pencil to Edit) – Enter Opportunity name – Enter maximum number of banners for this location (rotating display one at a time) – Enter dimensions for Opportunity banner
Step 2a: Assign Sponsor to Opportunity – Go to Onsite > Booth/Sponsor dashboard – Find Sponsor Booth or Create New Booth if Sponsor does not have one [Sponsor does not need to have a booth in Expo Hall. Booth Flag can then be NotPublic. However, Booth Rep should be added to access stats.] – Click Booth/Sponsor edit arrow for Booth details
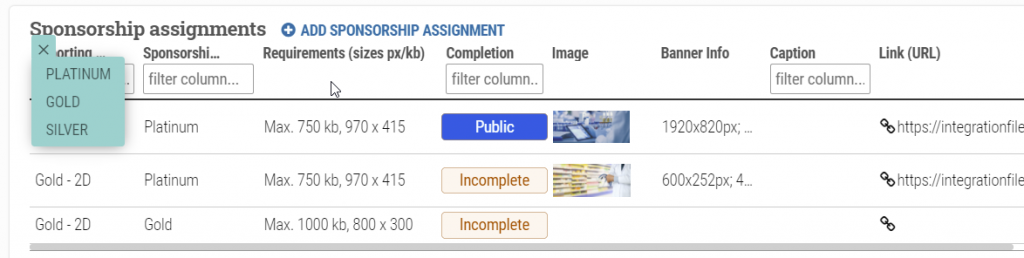
Booth/Sponsor dashboard > Booth/Sponsor details – Scroll to Sponsorship Assignments at bottom of page – Click ADD SPONSORSHIP ASSIGNMENT; select from Sponsor Opportunities
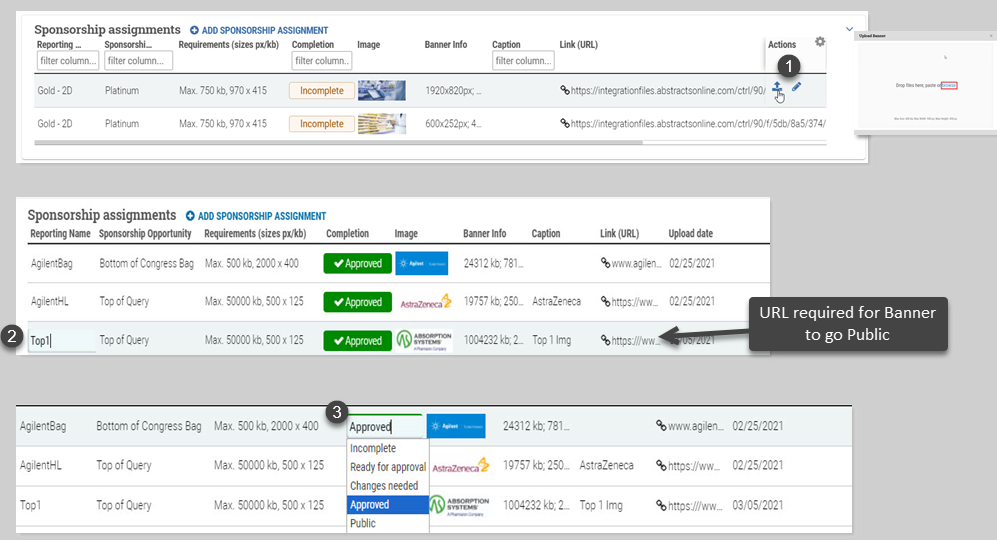
Step 2b: Upload, Publish Banner – Booth/Sponsor dashboard > Booth, Sponsor details 1. Click Upload Banner (hover), browse computer for banner, and upload 2. Name Assignment 3. Choose Status [Banner does not display until Public is chosen]
Step 3: Monitor Sponsorship Opportunities – Go to Onsite > Sponsorship Dashboard to: – Check progress on Opportunity sales and assignments – Identify Sponsor for each Opportunity location – Click Opportunity to go to Booth Details > Sponsor assignment to update Status
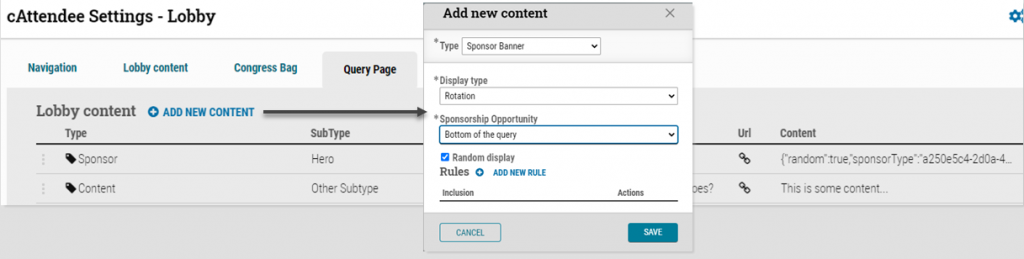
Step 4: Add Opportunity to Location, Edit Display Type – Go to Settings > cATTENDEE > Lobby Content / Navigation link (upper right-hand corner) – Select page tab where banner will appear (e.g., Query Page) – Click ADD NEW CONTENT – On Popup, pull down to Sponsor Banner – On Display Type, pull down to how Banner will display – Check if Random display
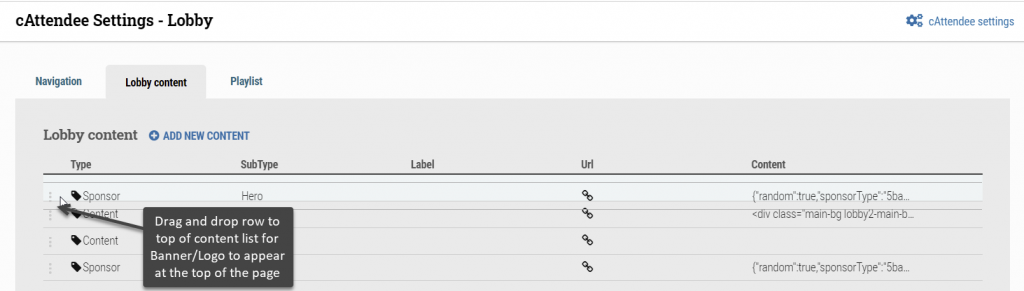
Step 5: Choose Location at top or bottom of page – Go to Settings > cATTENDEE > Lobby Content / Navigation – Select page tab where banner will appear (e.g., Lobby) – After Sponsor Content created, drag & drop row to top of content list for Banner/Logo to appear at the top of the page… (Or drag & drop row to bottom of list for the logo to appear at the bottom of the page)
Banner Stats in cAdmin>Analytics; Exhibitor Portal