This guide defines the configuration fields available in cSession Submission within cAdmin. It is intended as a reference for implementation, QA, and client setup documentation.
For each field below, you will find a short explanation of what it controls in the UI or workflow.
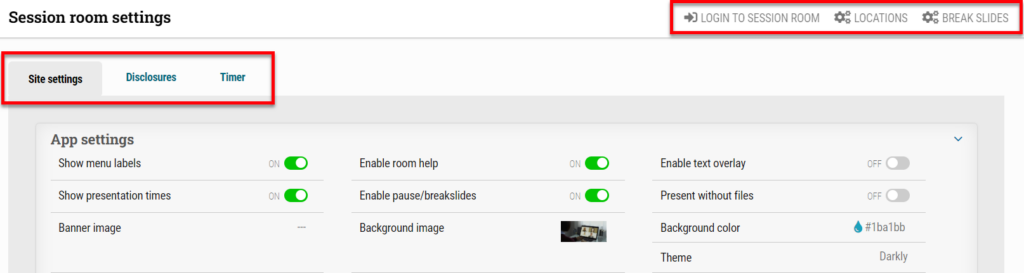
Site settings
Top-level configuration area for global cSession Submission settings.
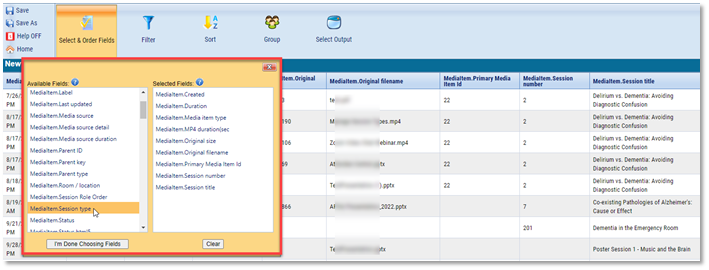
Session type(s) allowed
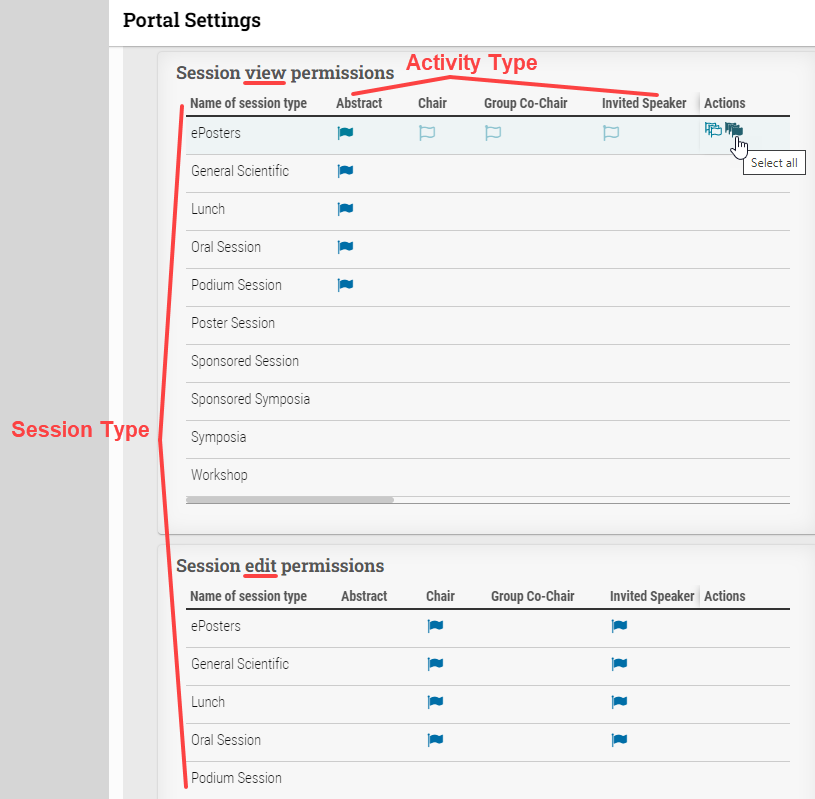
Controls which session types (e.g., Symposia) are enabled for Session Submission and appear in the Portal.
Symposia
A configured Session Type. Once allowed, it becomes available for submission in Portal.
Hide sort order for author list (ON/OFF)
Hides the sort order column/control in the author/participant list table.
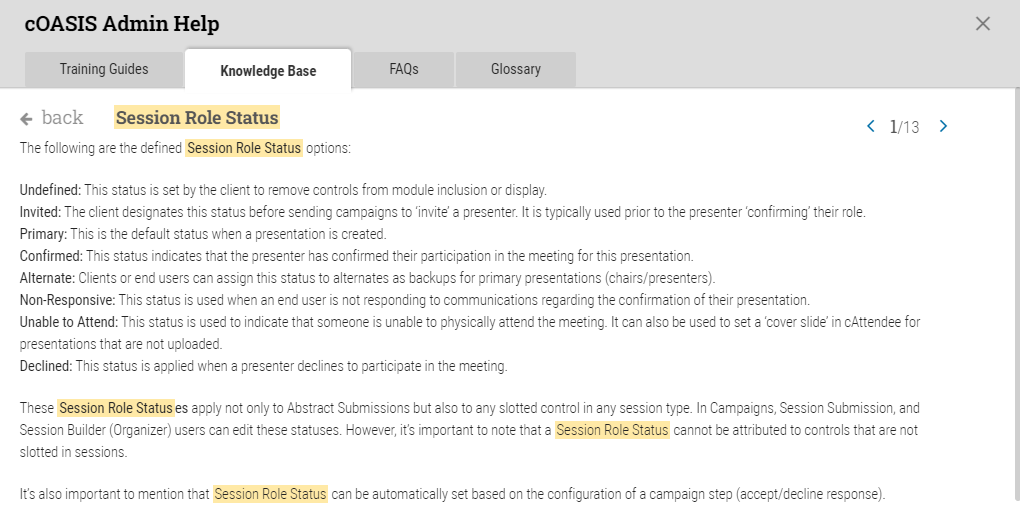
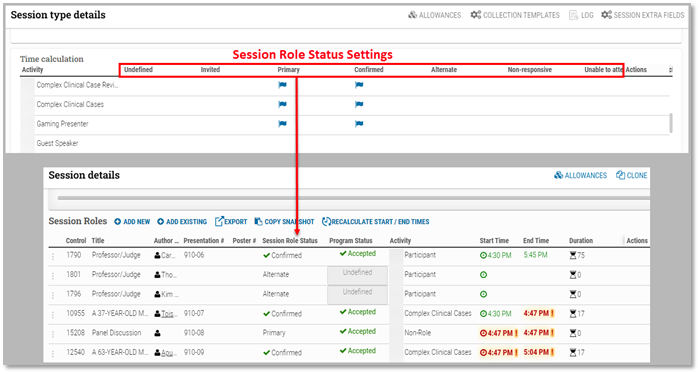
Hide Session Role status for author list (ON/OFF)
Hides the Session Role status column in the author list table. (Previously labeled “SR status.”)
Summary instructions
Free-text instructions shown on the Summary page.
HTML formatting is supported if no WYSIWYG editor is present.
Summary print view instructions
Instructions shown on the printable version of the Summary page.
People Lookup Settings (Global)
Configuration group controlling global People Lookup behavior.
Hide create account link in people lookup
Hides the ability to create a new person record from the lookup screen.
Best practice for AMS/SSO to prevent duplicates.
People lookup button text
Label displayed on the People Lookup button.
People lookup caption
Short text shown near the People Lookup button.
People lookup instructions
Instructions shown above the lookup search fields. HTML supported.
Author search service URL
Enables People Lookup integration.
Example format:
https://www.abstractsonline.com/oe3/Portal/PeopleSearch/{AssociationID}/oe2format
Associations using their own SSO require CTI development support.
Author search service uses FormPost
Requires CTI development support.
Session Type Settings
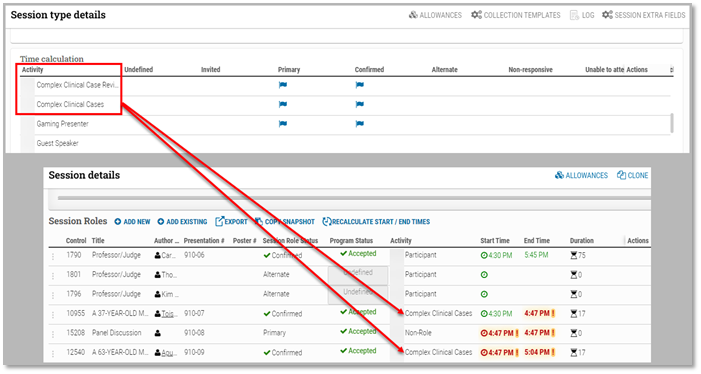
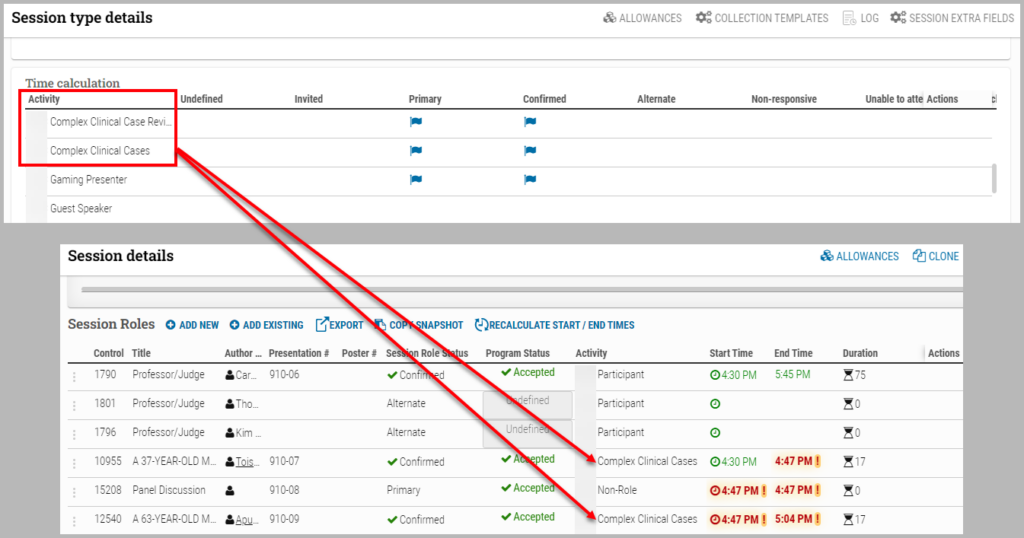
Activities allowed to be added (XML)
Defines which Activity Types (e.g., Chair, Invited Speaker) can be added.
Example:
<ActivityList>
  <Activity name="Chair"><![CDATA[Chair(s)]]></Activity>
</ActivityList>
Use conditional logic in session page
Enables XML-based conditional logic within the Session edit fields (XML) configuration for the primary Session Information step. When enabled, conditions (such as field dependencies and required warnings) will evaluate properly on the first session page.
This setting applies only to the main Session Information step. Conditional logic on Additional Pages (XML) is considered advanced configuration and requires development support to function correctly.
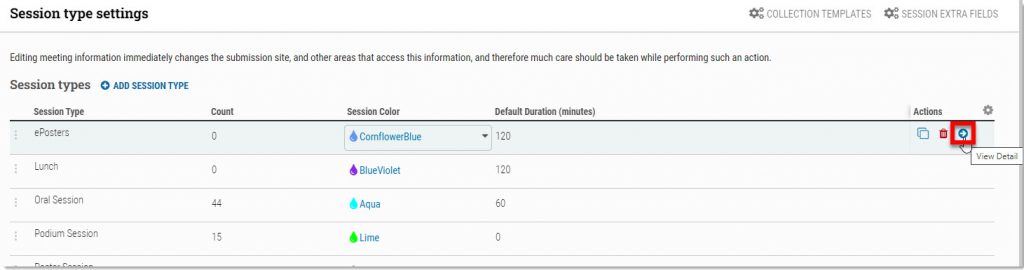
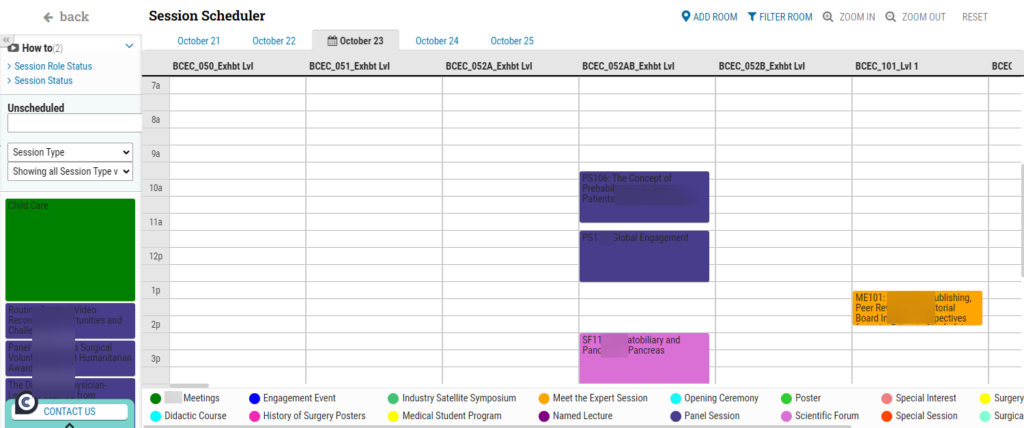
Default session duration (minutes)
Sets the default duration value for sessions of this type.
Display scientific section
Turn ON/OFF the scientific section of the session.
Do not allow creation of new session
Prevents users from creating new sessions of this type.
Do not display edit profile link
Will be obsolete in the new cSession Submission UI; flagged for removal.
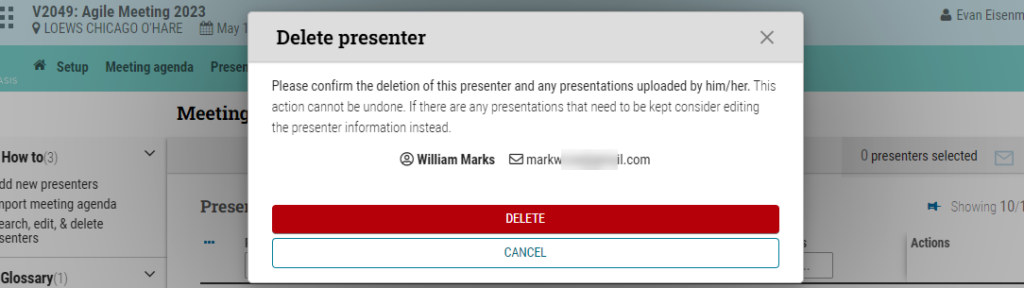
Do not display finalize button
Hides the Finalize button from the submission workflow.
Finalize button label
Custom text shown on the Finalize button.
Finalize action confirmation message
Message shown when user attempts to finalize. HTML supported.
Duration collection field
Determines how duration is collected.
Incomplete session error message for primary
Error message related to primary role completion.
Incomplete session error message for alternates
Error message related to alternate role completion.
Left hand menu color
Controls left navigation color styling.
Left hand menu extra items
Will be obsolete in the new cSession Submission UI; flagged for removal.
Left hand menu underline
Will be obsolete in the new cSession Submission UI; flagged for removal.
Limit sessions by account
Limits how many sessions a user can create.
Location of finalize button
Dropdown to control the placement of the Finalize button in the UI.
Session activity country limit
Limits country selections for activities.
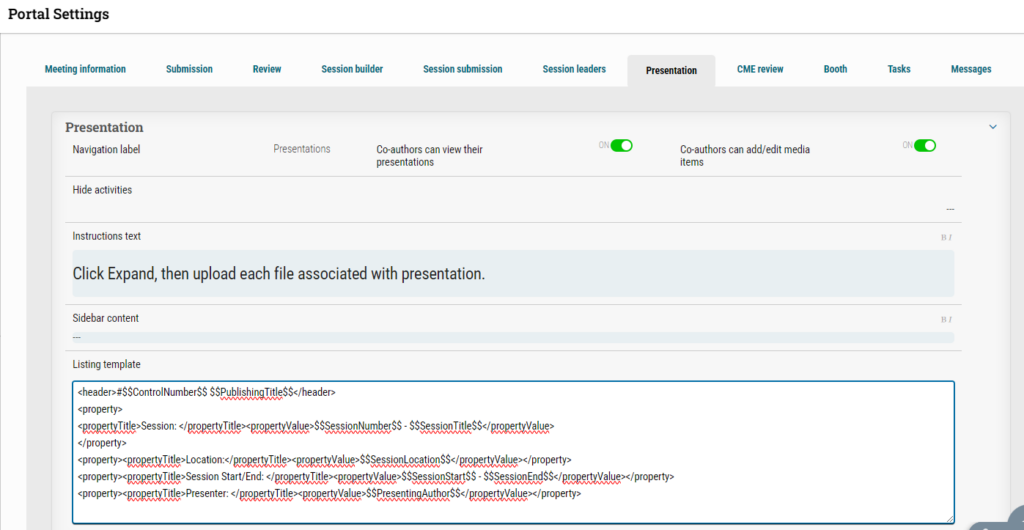
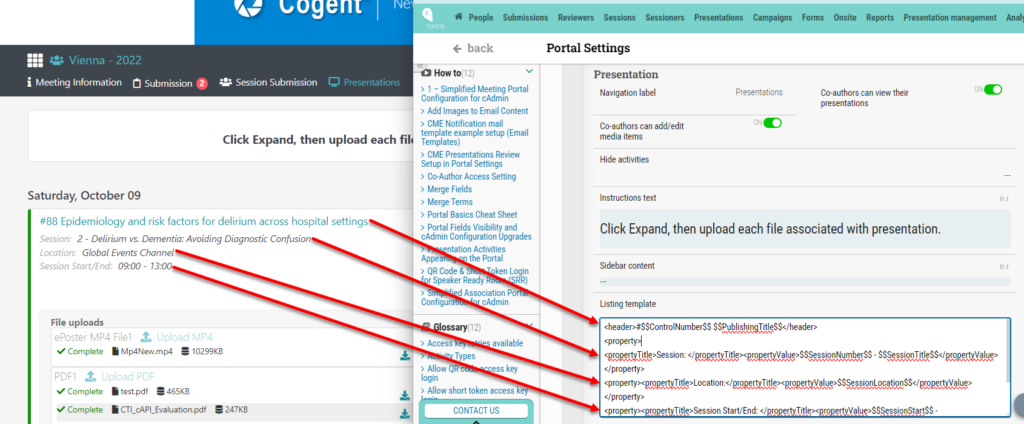
Session edit fields (XML)
Defines custom fields on the Session Information page (first step). See tooltip for XML example.
Session edit instructions
Instructional text shown at top of Session Information step.
Session information link text
Label for the Session Information step in left menu.
Session label text
Generic label for “Session” in UI text.
Session rich text buttons to allow
Will be obsolete in the new cSession Submission UI; flagged for removal.
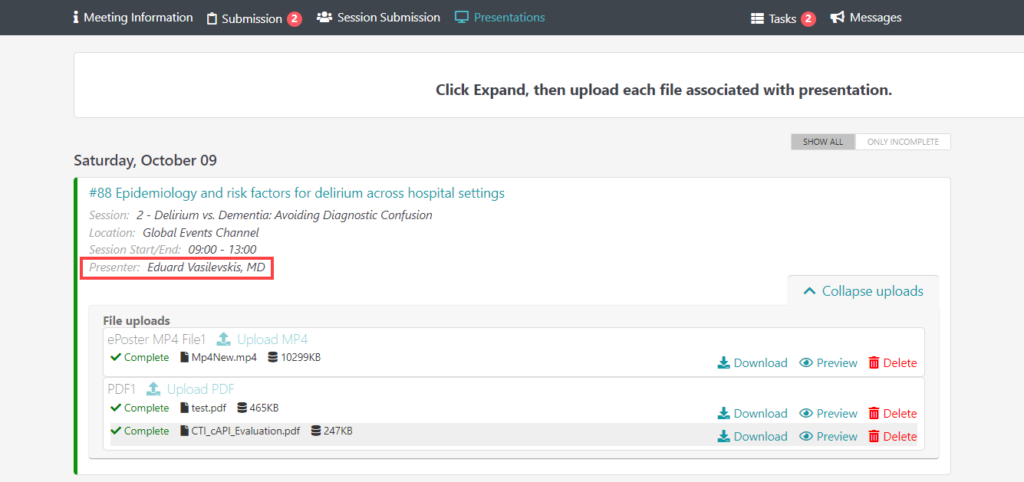
Session summary view (XML)
Customizes Summary layout. Leave blank to use default.
Session title validation (XML)
Defines title formatting and validation rules.
Example:
<TitleValidations>
  <Case>Upper</Case>
  <Bold>all</Bold>
  <Italic>none</Italic>
  <Underline>none</Underline>
  <Long>70</Long>
  <Short>30</Short>
</TitleValidations>
Submit email summary auto email
When enabled, automatically emails the session summary upon submission.
Only works if Finalize is enabled.
Summary complete / incomplete / locked / deleted instructions
Text blocks shown on Summary page depending on submission status.
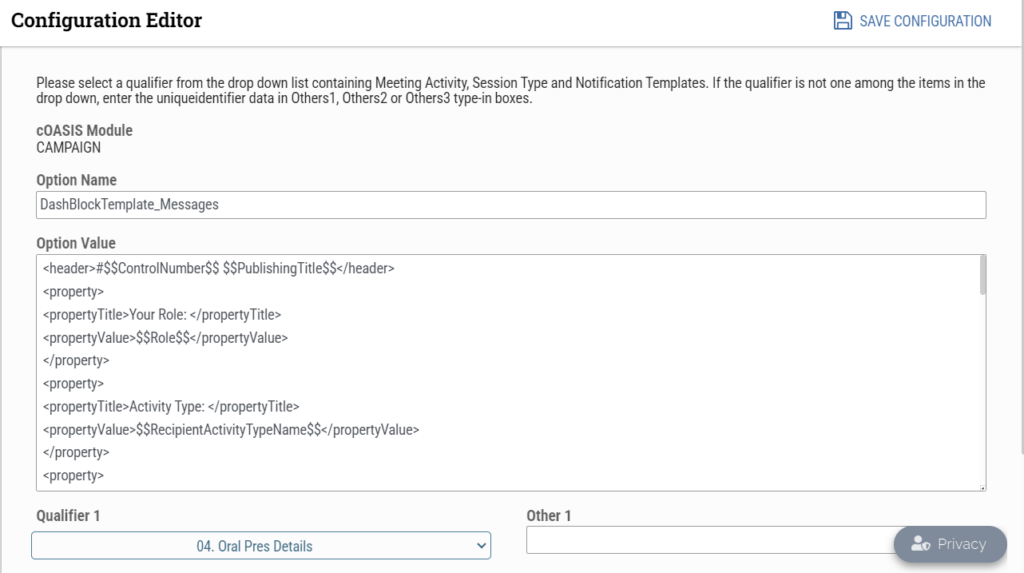
Summary email subject / from / body / sent instruction text
Defines auto-email content for summary email.
Workspace create session link label
Will be obsolete in the new cSession Submission UI; flagged for removal.
Page Settings
Additional pages (XML)
Defines additional submission steps. Additional steps must be between the first session information step and the activity step(s).
Example:
<SessionAdditionalPageList>
  <AdditionalPage id="1" name="AdditionalPage1"><![CDATA[Logistics]]></AdditionalPage>
</SessionAdditionalPageList>
Invalid XML may cause submission errors.
Session additional page 1 fields (XML)
Defines fields shown on Additional Page 1.
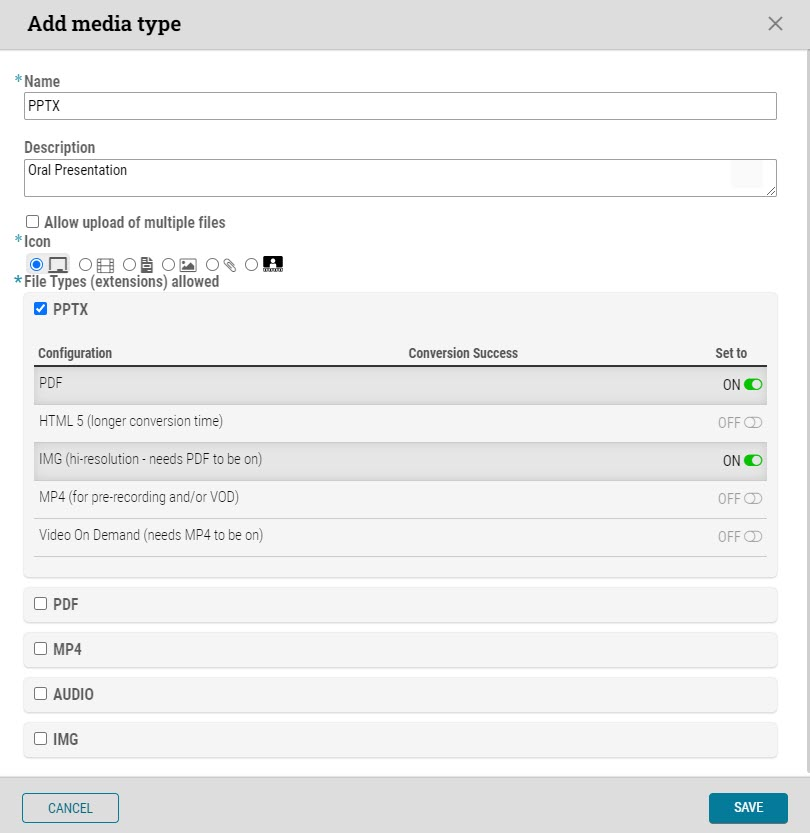
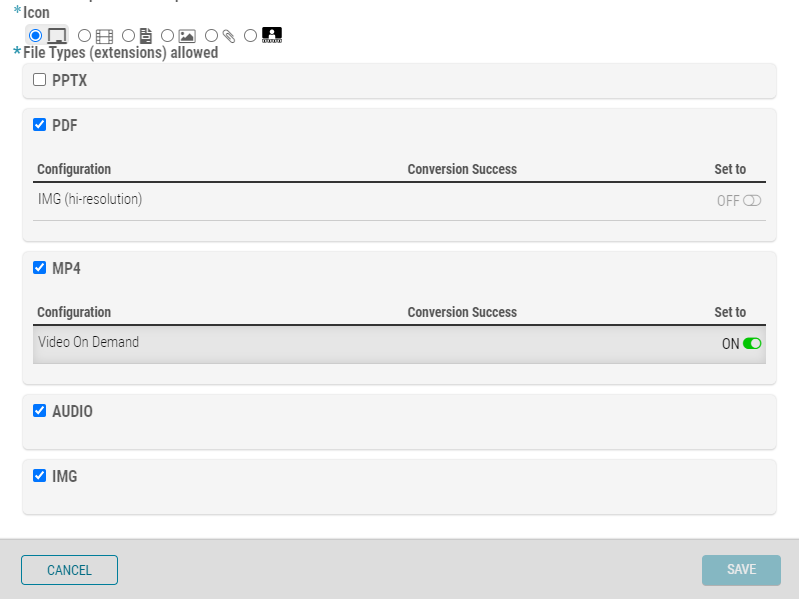
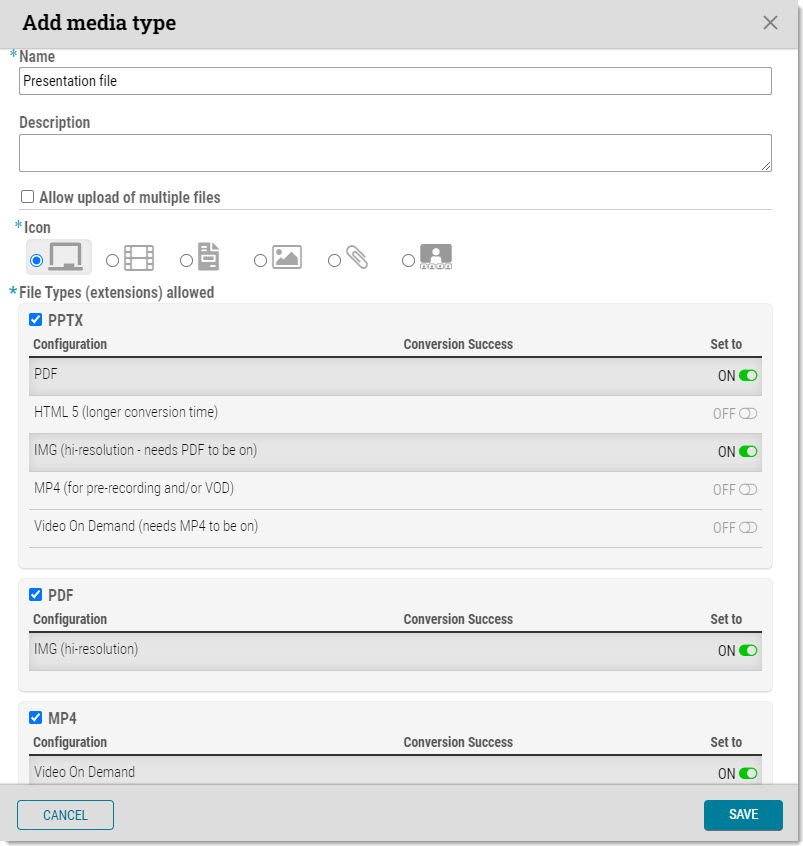
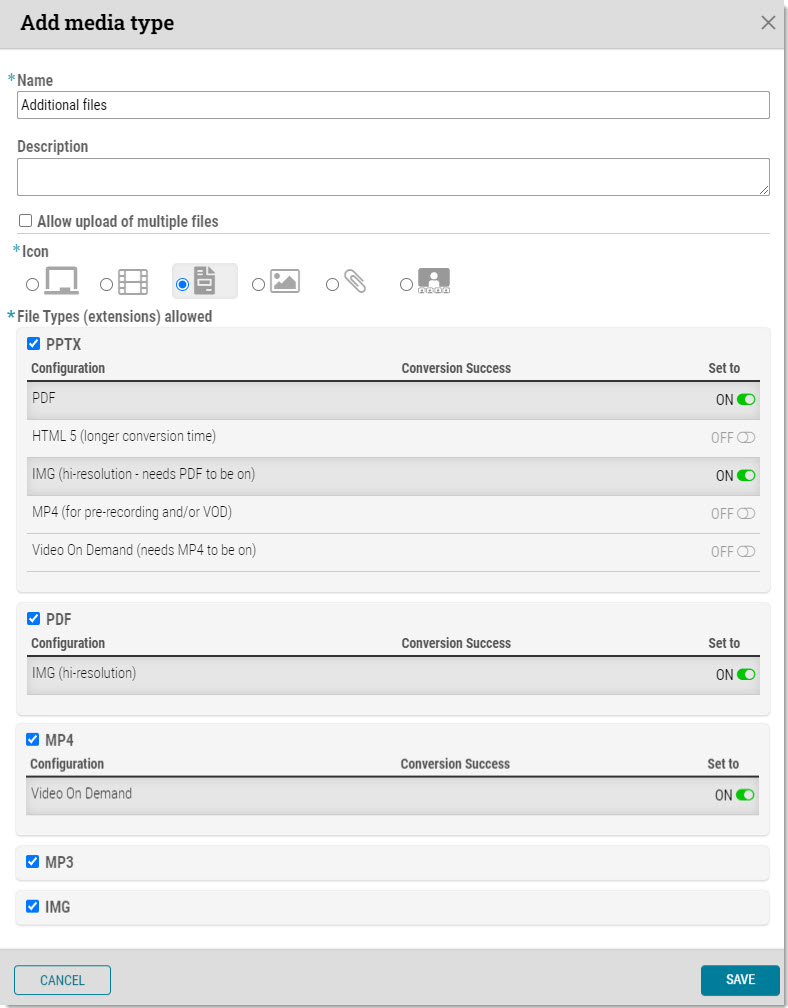
Session file attachment (if not numbered)
Controls whether file upload appears when attachments are not ordered/numbered.
Session file attachment instructions (if not numbered)
Instruction text shown above file upload field.
Does not control upload behavior.
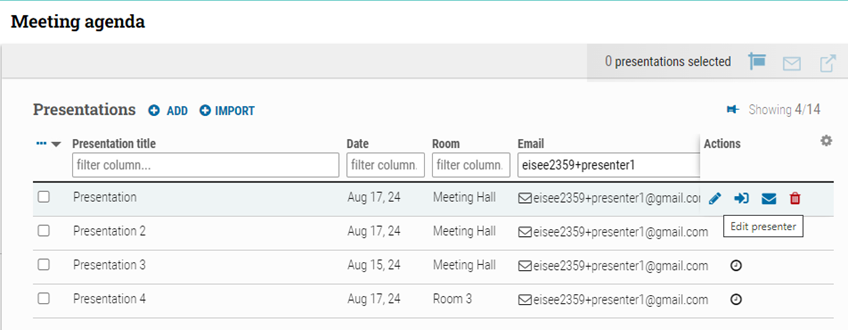
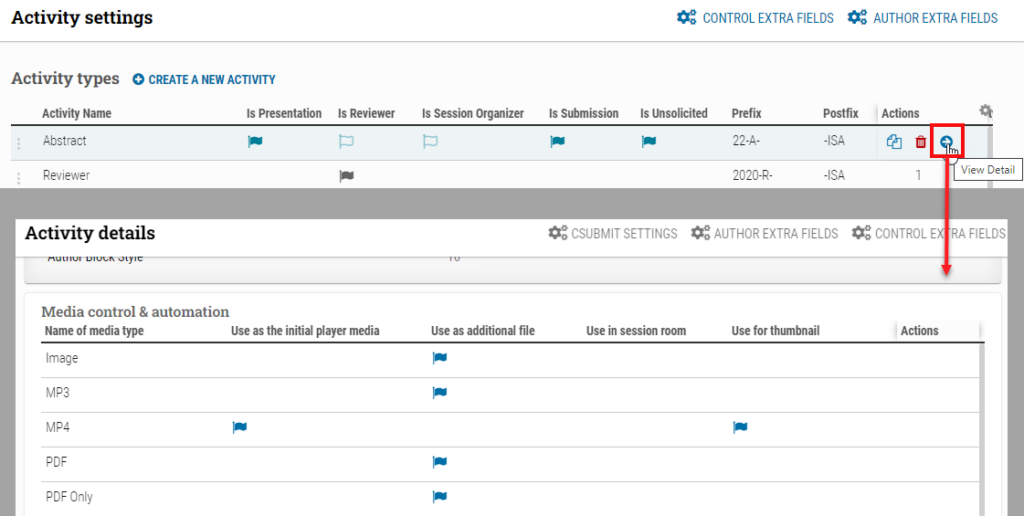
Activity Settings
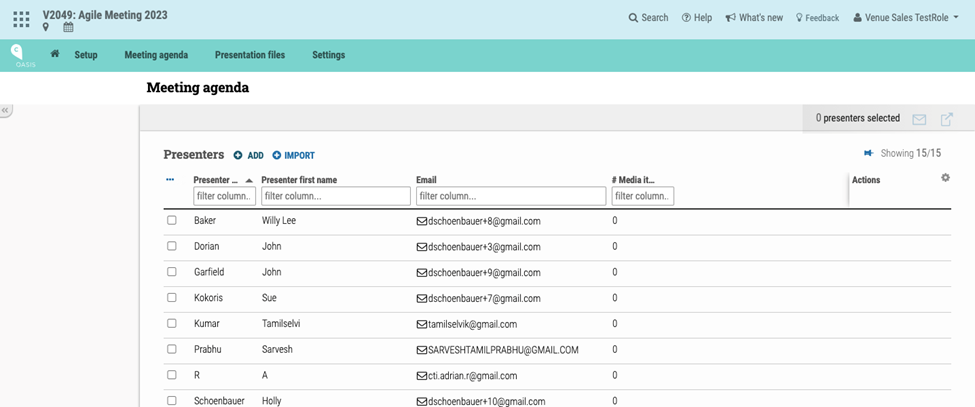
Author list instructions
Instructions shown at top of Chair activity page.
Hide author list sort order
Hides sorting control in activity-level author list.
Hide author list presentation status
Hides Session Role status column.
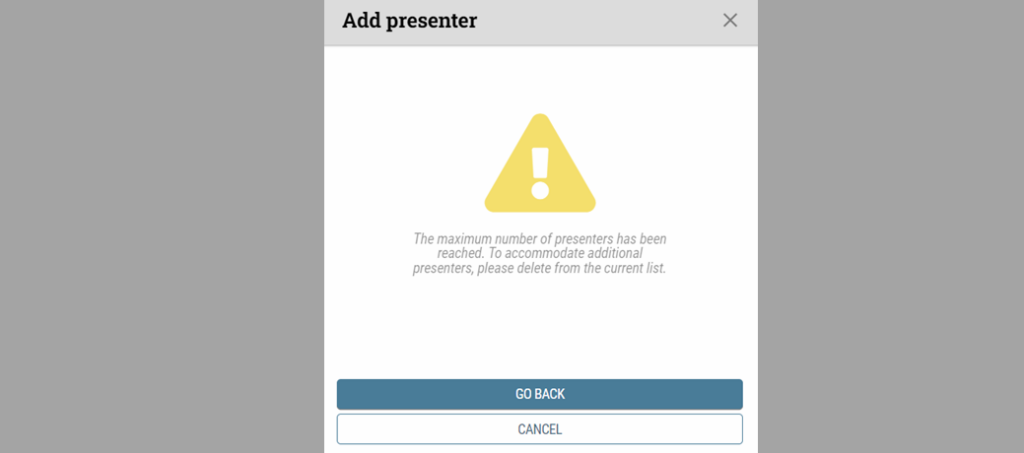
Max authors per control
Maximum number of participants allowed in this activity.
Author search service
Enables People Lookup for this activity.
Author search service wildcard automatic
Requires CTI development support.
Force people lookup
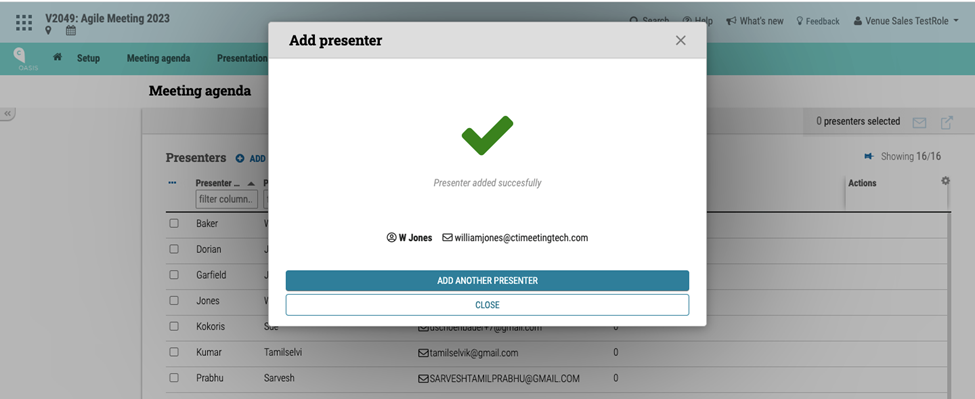
Forces users to select participants from People Lookup.
Lookup suppress add condition
Requires CTI development support.
People lookup copy contact address to institution
Requires CTI development support.
Participant lookup search layout (XML)
Defines search fields shown in lookup.
Participant lookup search result layout (XML)
Defines columns shown in lookup results. Supports masking (e.g., maskType=”email”).
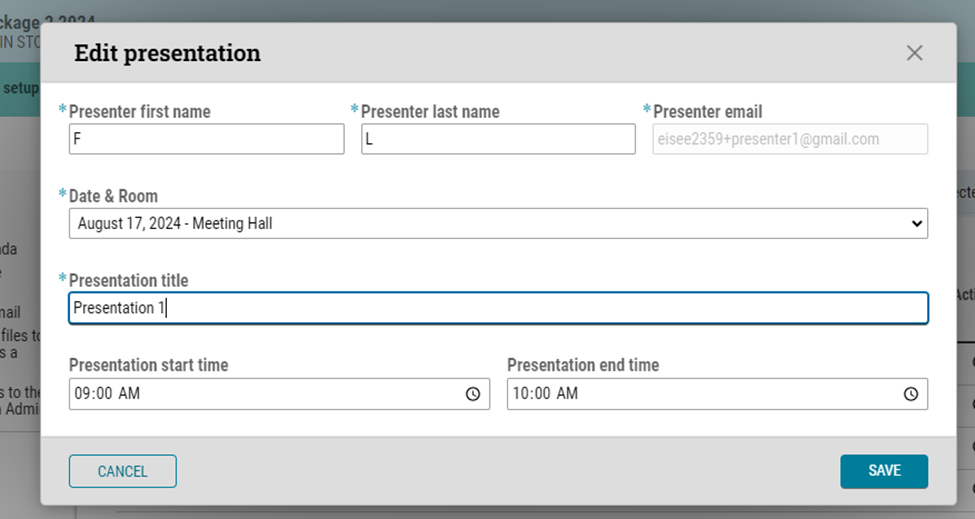
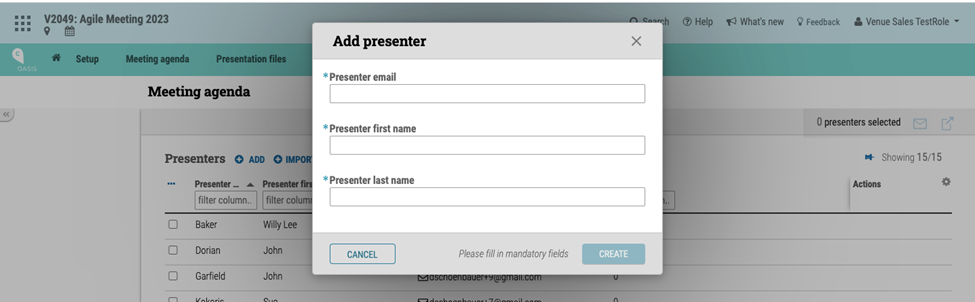
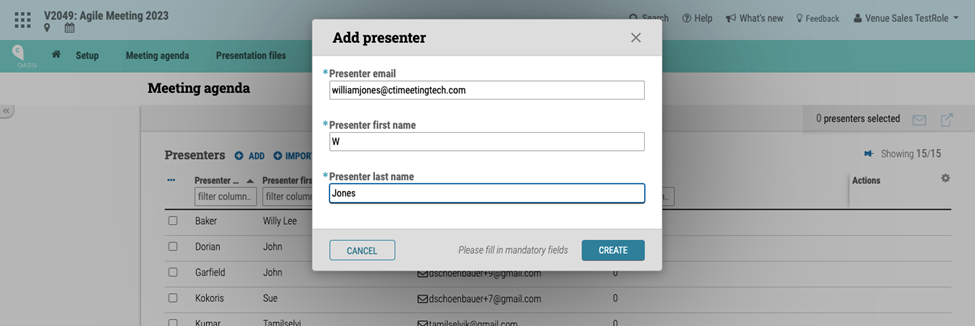
Author edit fields (XML)
Defines fields shown when editing a selected participant.
Best practice: First Name, Last Name, Email → Required + Not Editable.
Author custom validations
Validates that no two speakers are from same institution.
Validate author presented in last two years
Custom validation requiring dev support. Shows warning if triggered.
Associate alternate with presentation titles
Links alternates to titles.
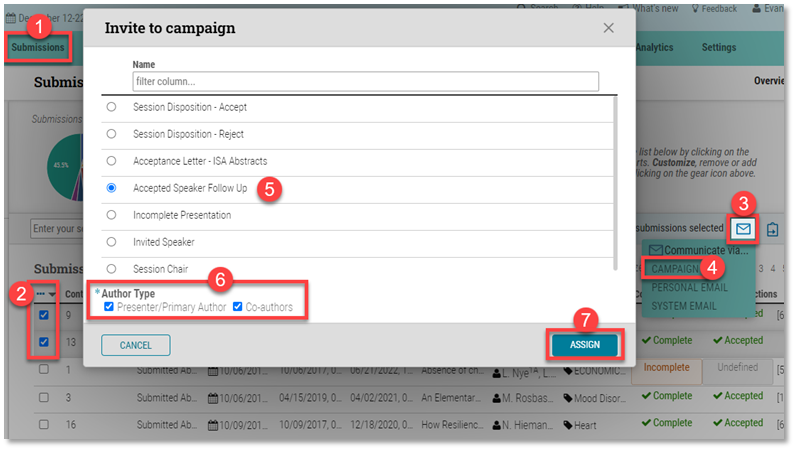
Auto-generate campaign
Triggers campaign when session is finalized. Requires Finalize enabled.
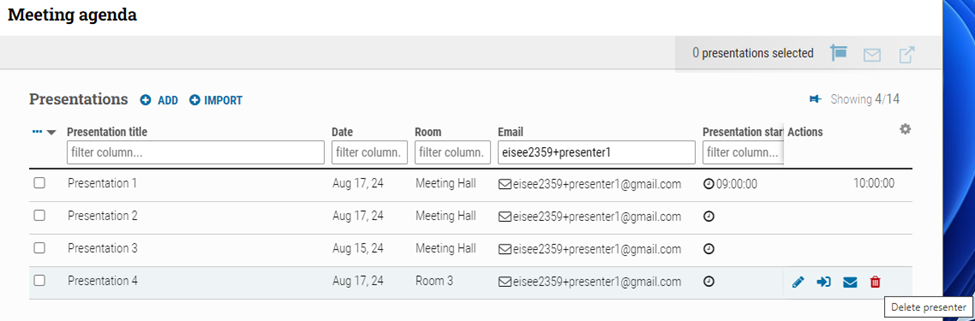
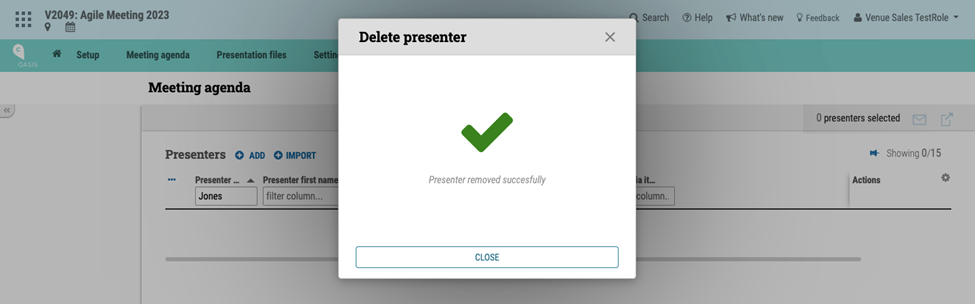
Submitter can delete/edit authors
Allows submitter to modify participant list.
Participant edit fields (XML)
Defines participant edit form layout.
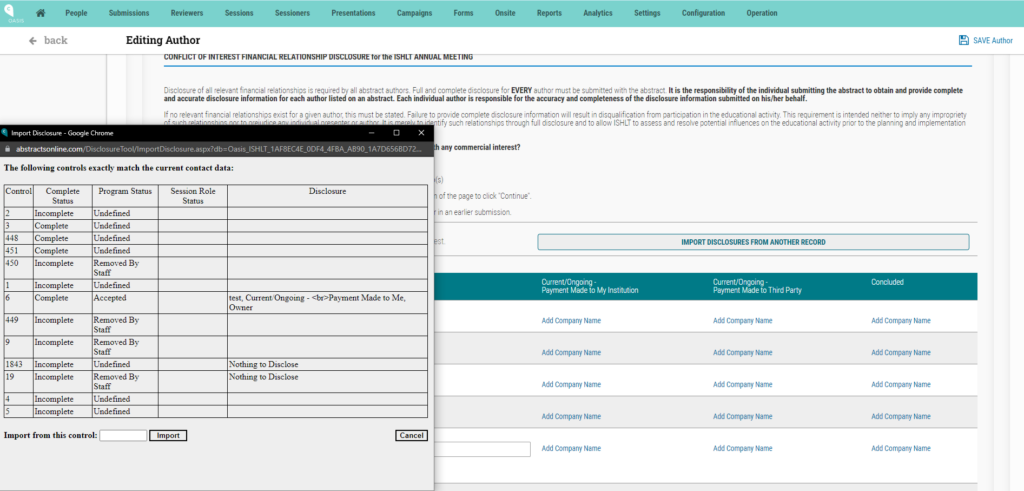
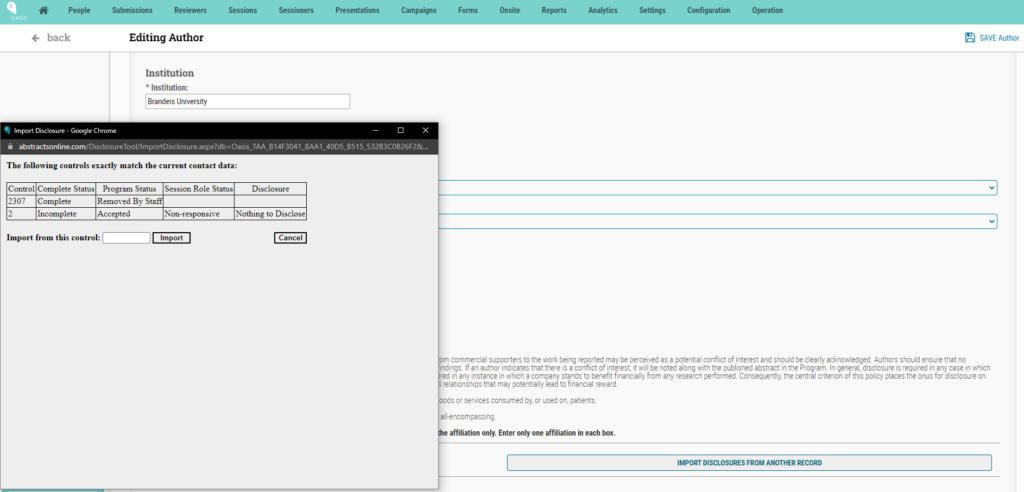
Collect disclosure using grid
Displays disclosures in grid format.
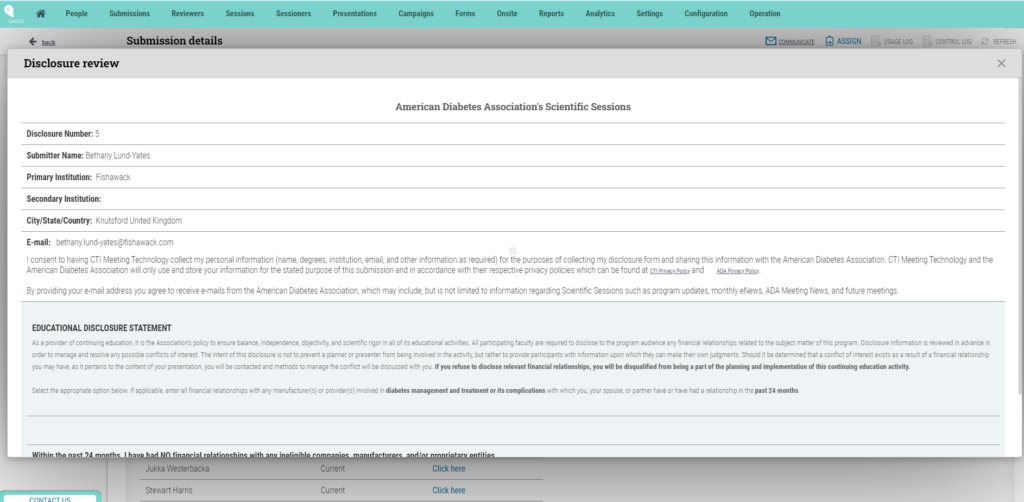
Disclosure settings
Controls disclosure UI labels and styling.
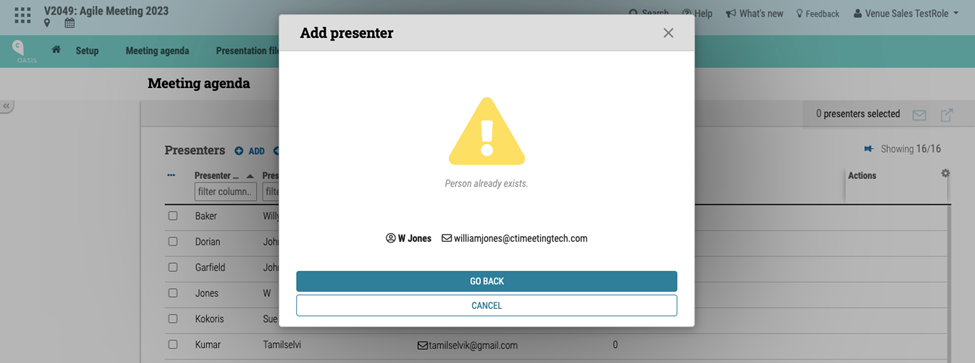
Reviewer already exists validation
When using forced lookup, warns if selected person already has a reviewer record.
Suppress add text
Will be obsolete in the new cSession Submission UI; flagged for removal.